

This post contains affiliate links and I will be compensated if you make a purchase after clicking on my links. I appreciate your support.
My partner and I had never owned a home together before. But when we were ready, we found a house that had a lot of potential. What really sold us was that it was a great neighborhood that had transportation including distance to the nearest hospital, stores, and college. I have already done some renovation/DIY projects, some of which you have already seen in my other postings. When we moved in, there were a few bathrooms. The first was the main bathroom that was already beautifully finished. However, the guest bathroom wasn’t up to par especially the shower.


When I first saw it, I knew exactly what I wanted to do with it from the walls down to the shower tiles. In one of my previous posts, I showed you how to add a wall panel to add accent to the bathroom. This time I’m going to show you how to take down and add any kind of shower tile you want. I think it is important to understand the different type of tiles, the difference between sanded and unsanded grouts, and how to properly care for it to prevent getting molds. For the guest bathroom shower, I used Satori Hudson Fog Gray 11” x 12” matte porcelain hexagon wall tiles and I replaced the old yellow looking tub with brand new white pendant porcelain enamel steel tub.
Acceptable locations for certain tiles
The tiles that are recommended for the WALL are porcelain, ceramic, natural stone, cement, quarry tile, saltillo, terra cotta, terrazzo, glass, mosaic, brick veneer and brick. You can absolutely use all of those above tiles for the FLOOR. However, I do not encourage you to use porous tiles for the wet areas as they can absorb liquids and require more maintenance for the upkeep to seal. The porous tiles can cause mold growth. The porous tiles are ok if you use them on the walls that isn’t in moisture or in a wet room. Porcelain, ceramic, natural stone and mosaic (not metal or glass) is acceptable for the shower floor, but I do not encourage you to have tiles on the shower floor to prevent mold growth. I recommend you to get either tub or shower pan.
To prep:
Chances are you will have to tear down the shower walls in order to put new cement boards for new tiles. Use a pry bar and a hammer to take down the shower walls. The result should look similar to like this…

When the old shower wall panels are down, the next step would be to add new cement boards since it is most likely be damaged from tearing down the tiles. Be extremely cautious to not cut the electrical wires or studs behind the wall with reciprocating jaw and do it pieces by pieces.


After taking out the old tub and replacing with new one, the hot/cold water are set up. I had a huge problem. Because I did not have cement board walls, I was in high danger of mold exposure. You need to use a cement board and moisture barrier for the wet zone. However, for a dry zone like a kitchen backsplash, you do not need a cement board. You can also go over the old tiles as long the existing tile isn’t cracked or damaged and the additional floor height works for transition areas.

I used ½” x 3ft x 5ft USG Durock Brand Cement Board with Edgeguard and 1 ⅝” rock-on nails made for Durock Wonderboard or equivalent. It is recommended that you get the size of the cement board ½” for the walls and ¼” for the floors.

I sealed the space between the tub and cement boards with Schluter Kerri-Band.
Background:
Adding the grouts is a messy process but it is essential to use them for shower tiles because it creates a waterproof seal to keep water off. You will know which to use whether it is unsanded or sanded grouts depending on the type of tiles you have. The unsanded grout is for the tiles with metal or glass (no abrasive materials or chemicals to prevent scratching on the tiles). The sanded grout is for the tiles with natural stone and ceramic. Sanded will scratch some speciality tile such as glass so you have to be careful, but it is easier to apply. Sanded is porous while non sanded is usually epoxy based and water proof. There are 1lb, 10lbs and 25lbs of grout bag so depending how big your tile project is will determine how many pounds you’ll need.
Mapei Grout Maximizer liquid is great to make the grouts stronger but you can use water instead if you do not want to spend that much money. It just helps with stain defense, strengthens the grout, and makes the color consistency really good.
Sealing tiles is important when it comes to prolonging the life of tiles and grouts. Mosaics containing natural stone should be sealed prior to grouting. For a natural look, use a premium penetrating sealer. To darken and highlight the natural stone, use a stone enhancing sealer. Don’t ever use sealers on glass, glazed ceramic or metal.
Cutting tiles, especially mosaics with a wet saw is recommended. To cut glass, you have to use a premium glass diamond blade. To cut ceramic, national stone and metal, you have to use a standard diamond blade. You can rent wet tile saw from Home Depot if you do not want to make an investment to buy tile saw or do not have storage room for it. You can rent however long you’d like.
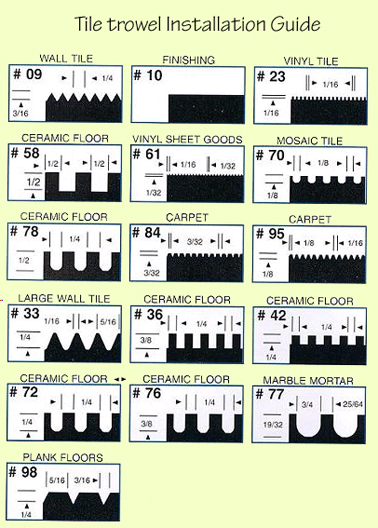
It is important to check what trowel your tiles requires to have successful tile installation. To understand the type of trowel you are using, grooving “comb” the tile helps the mortar to settle into position without trapping air behind the tile and weakening the installation. You can use bottom of the trowel to pick up the tile adhesive to put on the wall or wherever else you are putting tiles on, but I prefer to use the putty knife because it was easier for me. To set a piece of tile, you will butter the back with the mortar but for the mesh backing tiles, butter the wall instead. Hold the trowel at an angle around 45 degrees or so. The gum rubber float helps put pressure in after you install the tiles on to make sure it really sticks in the adhesive really well.
Supplies You May Need For This Project:
- 64oz Mapei Grout Maximizer Sanded Grout liquid (or 2 qts water)
- 25lbs Mapei Keracolor S Sanded Grout Powder
- 3 of 5 gallon buckets
- A drill with steel spiral mixer
- 1 sponge
- 1 rubber float
- Notched Trowel Marshalltown 771S 15771 3/16 x 5/32” -V
- Tiles
- Acrylpro professional tile adhesive
- Wet saw
- Level
Step-By-Step Tutorial: DIY tiles
How to install tiles:
- Apply a premium grade white thin-set mortar such as AcrylPro Professional tile adhesive using a V-notch trowel.
- Set tiles, apply pressure or tap the surfaces with a rubber grout float and level periodically.
- After 24 hours, mix and apply grout (see below on how to add grouts).
- Clean all excess grout in a few minutes with a damp sponge. After 12 hours polish any remaining grout haze with a clean dry cloth.


How to add grouts:
- Clear the debris and make sure it is clean
- Shake/mix a whole bag of Mapei Keracolor S Sanded Grout
- Use a whole container of mapei grout liquid or water to a bucket
- Add the Mapei Keracolor powder to the bucket
- Set a timer for 3-5 minutes using a steel spiral mixer drill to mix the grouts
- Let it sit for 5 minutes and then mix again for 1-2 minutes
- While waiting for 5 minutes, fill the other 2 buckets halfway with clean water (for clear water and “dirty water”)
- Use “dirty water” bucket to clean the steel spiral mixer so you won’t have to deal with harden grouts on it later
- Use a rubber float to pick up the grouts in small sections and follow the line of tiles gap to fill in. Make sure it is completely covered. Do not worry if it is a little overlay, you will remove excess later.
IMPORTANT: MAKE SURE TO FREQUENTLY STIR THE GROUTS BUCKET TO PREVENT FROM DRYING OUT!!!

10. Use rubber float to remove the excess and wait for 15-30 minutes (depending on humidity and temperature) before using sponge to wipe up to remove hazing on the tiles
11. Use the 1st bucket of “dirty water” to drain out the sponge and then use the 2nd bucket of “clean water” to double clean the sponge before wiping again on the tiles
12. Use microfiber to wipe the tiles after cleaning the sponge to prevent film on the tiles and make sure there is no hazing on the tiles
Repeat the process (steps 9-12)


I purposely did not want big tiles for my first tiling project and I am glad I chose this type of mesh backing tiles because I was able to cut out one piece at a time to work around with awkward spots like faucet, shower head, and shower niche like below…


Grouts is a lot of work and time consuming, but you can absolutely do it. Just make sure to keep changing the water buckets when you see heavily cloudy looking water in the clean water bucket and to keep stirring the grouts bucket every now and then to prevent from drying out. Do not immerse the tiles and grouts in water or cleaning solutions for at least 21 days after completion.
How much cleaning does tile require?
To care for tiles, use a soft cloth or sponge with warm water or any non-abrasive mild detergent. Do not use acidic or basic solution such as bleach or all purpose cleaners on your grout as these can damage it.
Porcelain/Ceramic: easy to clean, water resistant, can prevents mold/mildew
Stone: low maintenance
Glass: reflective, easy to clean
Metal: susceptible to staining, scratches, and scuffs but requires more frequent cleaning
How to prolong your grouts
Although grout creates a waterproof seal, the heat and moisture cause it to break down. As grouts ages, it starts to lose some of these properties. Water can sneak between the tiles and cause mold/mildew. There is no avoiding either of these any time you take a shower but you can limit or prolong it. Grouts tend to last between 8-16 years depending on the care. I encourage you to run your bathroom exhaust fan while you shower and after the shower for few minutes to ventilate and eliminate any moisture. Wipe down the tiles with cloth or towel.
It is also possible you would not know how long it is been if you were not the one who did the shower tiles from previous owners unless you ask. The only way to tell if you will need to regrout the tiles is to pay attention to the mold growth on the grouts surface (more difficult to identify mold with dark grouts) and your grouts need to be smooth so if it starts to crumble away when you apply moderate pressure with your fingernail then it is time to replace the grouts.
Take a moment to enjoy the hard work you did to DIY the shower tiles. I know I did when I completed it. It ended up beautiful for my first time and I was proud of myself.


